Usage
How to use
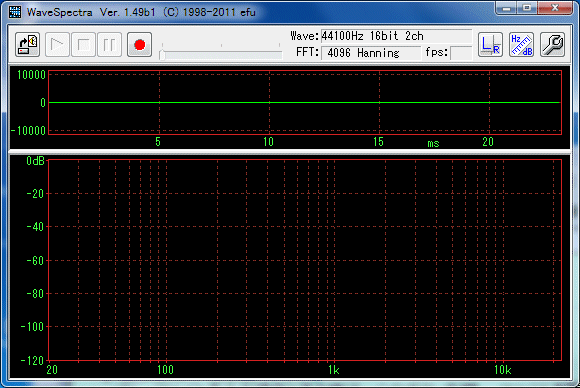
It is the main window right after startup.
* If you click the position of a button, a combo box, etc. in the figure below, it jumps to the explanation of that part.

Wave File Performance
 Wave File Open Button
When using Wave file as input signal, press this button to open the file.
*You can also open files by dragging and dropping files from Explorer etc. to the main window.
*You can also open a file by dragging and dropping it from the explorer etc. to the shortcut icon.
*Hold down the shift key and press play List window opens, you can play multiple Wave files consecutively.
The playlist window will also open when dragging and dropping multiple files in bulk from the Explorer etc. to the main window or icon.
*Since it corresponds also to the command line argument, shortcut By placing a space after the link destination of the property of the icon (right click), write the file name directly, you can play directly with double click.
*When you perform file association (right button - Open from program - Select prescribed program) with explorer etc., just double click on Wave file It will be able to open in WaveSpectra. play button
Play the opened file.
*Shift key pressedPressing this button will start in paused state.
See the section on the bottom pose. stop button
Stop playback / recording. pause button
Pause it.
*You can read out (read values) by moving the mouse cursor to each display window of Wave / Spectrum during pause.
(See the Lead-out section)
While pausing, the function to specify the position accurately You can also use it.
(Please refer to the section Analysis position fine designation function )
Fast forward / rewind
 track bar
While playing Wave file, you can click on the left and right parts of the knob or drag the knob to any position " fast forward / rewind "
During playing, the elapsed time is displayed on the upper left side of the track bar, and the total playing time of the data on the right side is displayed.
![]()
*During pause, Wave / Spectrum display Also follow.
In addition, there is a function to specify an arbitrary position exactly by the number of samples and elapsed time.
(Please refer to the section Analysis position fine designation function )
*If the length of the Wave file is short and the analysis position You can start from the beginning in a pause state by pressing the play button while holding down the shift key for the case where you can not make it in time for the play & pause button action to use the fine designation function.
While inputting from the sound device, go to the upper left of the track bar "Rec. In." Will be displayed with " red ".
(Continue input / display until you press stop button)
![]()
While recording while writing to a Wave file, go to the upper left of the track bar " Red " with elapsed time, on the right side, writeable writable " remaining time " is displayed. (Maximum remaining time display is 999 minutes 59 seconds)
![]()
Input / recording from a sound device
 input / record button from the sound device
If you press this button, you can use the input of the sound device directly as input signal.
Also, if you set to record to a file at setting dialog - Play / Record Tab - Recording - Recording to file , You can create a wave file by simultaneous recording.
Note:
In the initial state, the size of one Wave file is the upper limit of Wave file 2 GB (32 GB maximum is 4 GB, but there are play / edit software which does not support) , It will be split every 2 GB.
For example, if the file named ABC.WAV exceeds 2 GB,
ABC - 01. WAV
A file with _01, _ 02 etc. added to the file name is created as shown in Fig. (maximum 99)
You can also press Ctrl + D key to Forcibly split (Divide) files.
It is convenient when you want to divide it at breaks of songs.
*If you do not want to split with 2 GB, you can record in RF 64 format which can also create files of 4 GB or more.
Please refer to the RF64 section of the setting dialog.
(Please note that you can not forcibly divide by Ctrl + D key while recording in RF 64 format.)
[Technical]
The division unit 2 GB can be changed as follows.
WS.INI and WS_2.INI
In the [Conditions] section anywhere is good so
RecFileDivideBytes = 0x7FF00000
If you add a line like this, it will be split if the file size becomes more than this number (bytes).
The above 0x0x7FF00000 (2047MB) is the default.
Lch / Rch switching
![]() if it is pressed
if it is pressed ![]() Lch, Rch.
Lch, Rch.
(The unevenness of the button may be difficult to see depending on the theme setting on the screen, but the channel with the larger L or R character of the button is currently enabled)
It becomes invalid with a monaural signal.
Also, in the multi-channel format of 3 to 8 ch, the L / R button is placed in the combo box like ![]() You can change the channel number to be displayed.
You can change the channel number to be displayed.
*At this time, the Lissajous display (if it is displayed) corresponds to the Lch signal when the signal of the selected channel is 2 ch, the signal of the next channel corresponds to It is displayed to correspond to the signal of Rch.
(When the selected channel is the last channel, the next channel is It returns to 1)
Measurement mode
 Measurement mode button
The measurement mode is entered.
(See the Measurement Mode section)
setting
 setting button
You can change various settings.
(See the Settings Dialog section)
 Displays the format of the currently open Wave file or information on the recording format.
Sampling frequency, number of bits, number of channels, and When in the BWF (Broadcast Wave Format) format 'B' Also, '64' when using RF 64 format The character is added.
*Right clicking on this area opens the Wave file information window and displays detailed internal data information (chunk structure) I can.
 The sample data number of the FFT and the name of the window function are displayed.
You can set FFT by FFT tab in the setting dialog.
 Displays the number of updates of the waveform display per second during playback / recording operation. (Frame per sec)
In addition, to reduce the CPU load, you can set the waveform display method so that it draws as fast as possible.
Please refer to Drawing method - Automatic setting in the setting dialog.
- Wave waveform is displayed.
You can change the display magnification of the vertical and horizontal axes.
( preferences dialog - Wave - vertical axis (Amplitude) , Horizontal axis (Time) ))
You can lead out numeric values ??while pausing.
Sometimes asked, the unit of the left scale is an integer value corresponding to the 16 bit PCM signal, 32767 It is ~ -32768.
When it is 24bit, 32bit, 32bit floating point data, it will be confusing if the maximum value changes, so that the integer part becomes It is shifted by adding decimal part so that it becomes 16 bit. (Internal operation is 64 bit floating point)

- Wave waveform display during FFT operation shows the same as do the oscilloscope's trigger action in order to stop the waveform flow as much as possible and make it easy to see.
(Trigger level: 0 Slope: +) - However, there is no trigger action when stopped in pause Display Wave data as it is.
Therefore, the Wave data itself FFTed at that time is displayed from the beginning.
*In particular, if the magnification of Wave - horizontal axis (Time) is set to x1, it is FFTed It means that all the samples of the wave data being displayed are displayed. - Waveform display is simply connecting the sample points of the PCM signal with a straight line for convenience.
Therefore, it is different from the analog waveform actually output from the D / A converter.
For example, in the case of a sine wave with a high frequency, there are few sample points, so it looks like a jaggy waveform, but the analog waveform actually output from the D / A converter is interpolated into a smooth sine wave.
In order to reproduce an actual analog waveform, it suffices to interpolate the waveform between sample points and draw it, but for now it does not support it.
- Spectrum is displayed.
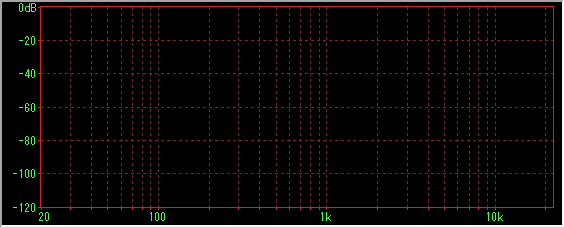
In addition to dB / Log display as shown below, it is also possible to change the vertical and horizontal axes to linear display.
( preferences dialog - Spectrum - vertical axis (Amplitude) , Horizontal axis (Frequency) ))
You can lead out numeric values ??while pausing.
The display changes in measurement mode.
(See the Measurement Mode section)

- *screen You can also add a comment so that it is handy when copying and pasting.
Settings dialog Spectrum tab - See and edit comment lines .

End
- Termination, especially because there is no dedicated button, either the upper left system menu button or the upper right Close button
 .
.
Created with the Personal Edition of HelpNDoc: Benefits of a Help Authoring Tool